Pages

Showing posts with label Friends. Show all posts

Sunday, October 8, 2017

S'mores Cheesecake

Hi!

As I have stated in the earlier post, I have been experimenting a lot with cheesecakes. When is the best time to experiment? During celebrations of course! My girl Amal just joined the 26 y/o club a couple of weeks back.  As an adult, I really have trouble thinking of things to get my friends. Mind you most of them make more money than I do and can afford more things than me (I am still a poor student remember? :p) I always have and still believe that the best gifts are either 1)experiential or 2) homemade. So I chose the latter of course because with our busy schedules there are no way we could have gone anywhere adventurous.

Three years back, I made Amal an Oreo Cheesecake and this year I though long and hard about what flavours she may like. Chocolates! Making chocolate cakes/chocolate cheesecakes are too mainstream! So I decided to make S’mores Cheesecake instead because why not? There were only 5 of us I made a smaller version of the cake. I simply use 1/3 of the recipe and bake the cake in a 6" pan.


S'mores Cheesecake

3 sticks of cream cheese (750g), room temperature
3 eggs
2 tablespoon of all-purpose flour
1 cup sugar
¼ cup milk
a dash of vanilla essence
1 ¼  cup of finely crushed graham crackers
¼   to ½ cup of melted butter
½ of 165g Cadbury Chocolate Bar cut into chunks

Topping
½ of 165g Cadbury Chocolate Bar (melted)
Marshmallows
Digestive biscuit chunks
  1. Preheat oven to 325 degree Fahrenheit (300 degrees if using a dark non-stick spring form) the insides of a 9-inch spring form with parchment paper. Set aside
  2. In a bowl, mix the crushed graham crackers and melted butter together. Press firmly on the bottom and the sides of spring form.
  3. Bake for 10 minutes and set aside.
  4. In the meantime, mix the cream and sugar together using an electric mixer until well blended.
  5. Add in the flour and continue beating.
  6. Add in milk and vanilla essence and eggs and beat until combined.
  7. Using a spoon, mix in the chunks of chocolate bar into the batter.
  8. Pour the cream cheese batter onto the baked crust.
  9. Bake for 35 -45 minutes. The middle should still jiggle while the sides are slightly firm to touch.
  10. Let cool in the oven.
  11. Once cooled, let it set in the fridge for 3 hours minimum.
To decorate;
    1. Melt the remaining chocolate bar using the microwave of the double boiler method.
    2. Cover the top of the cheesecake with the melted chocolate.
    3. Burn the marshmallow using a blow torch or broil them under the broiler for a couple of seconds until it reaches your preferred burnt level.
    4. Arrange the burnt marshmallows and biscuit chunks on the cheesecake.


Birthday girl loves her cheesecake and I love her! Happy Birthday Amal!<3


Bon appetite!

Love,
Soffy

Thursday, May 15, 2014

Strawberry Rosewater Mousse

Assalamualaikum!

I haven’t blogged for two months.Oh boy… Not that I haven’t baked or made desserts, but I just never got myself to blog about them. I have finally finished my Undergrad *Alhamdulillah*! So I have more time now to compile the recipes I’ve used before on my blog. Yeay.

One of my favorite desserts is mousse. I FREAKING LOVE MOUSSE. It’s light and fluffy. It’s like eating flavored clouds that melts in your mouth. AHAHAH. Amidst papers and midterms, I was obsessed by My Kitchen Rules! I learned so much from that show! Anyways, one of the groups made Raspberry and Rosewater Mousse and straight away, it went to my To-Try list. For some reason,(I cant think why now) I opted for strawberries instead of raspberries. Now I really want to try the raspberry version...soon.

I love everything roses; the flower itself and its amazing scent. The rosewater brings the strawberry mousse to another level! I never knew that there is such thing as a floral taste but trust me, IT’S AMAZING! This mousse can be quite sweet, thus reserving some of the balsamic strawberry purée balances it all out while adding a hint of sharpness in the mousse. *heaven*.


Strawberry Rosewater Mousse
3 egg whites
3/4 cup sugar
2 cup heavy/whipping cream
1 teaspoon of gelatin and 1/8 cup of warm water
1 pint of strawberries
1-2 tablespoons of rosewater
2 teaspoons of balsamic vinegar
  1. Using a blender, purée the strawberries and add the balsamic vinegar. Set aside.
  2. Using an electric mixer beat the egg whites until foamy.
  3. Then, add sugar, two table spoon at a time, until hard peaks form. Set aside
  4. In a different bowl, whip the heavy/whipping cream until medium or hard peaks.
  5. Fold the whipped cream ¾ of the balsamic strawberry purée into the egg whites mixture until well combined.
  6. Add the rosewater. Adjust to your liking.
  7. Melt some gelatin in the warm water and add it to the mixture as well.
  8. In your serving cups/ bowls, spoon a layer of the remaining balsamic strawberry purée and then add your mousse.
  9. Refrigerate before serving.

 I was contemplating whether or not I should add the refrigerate part. Lets be honest here. A HUGE CHUNK of the mousse already went into my mouth even before it went into the cups.=P imma walrus liddat. If you don’t want the balsamic strawberry purée layer, by all means add them all up into the mousse. The original recipe calls for a tablespoon of balsamic vinegar and it was tooooo much for me. Burned my throat in every bite. But yeap. I still finished ALL OF EM.
Also, if you don’t have or don’t want to add in gelatin, don’t. You can definitely leave it out. It is better to use gelatin if you are using molds instead of cups.


Currently I’m living with 3 other amazing girls and two of them are Arabs. Whenever I went to an Arab household, it’s interesting to see what tea or coffee they serve and of course what kind of tea sets or cups they use! SO naturally, I had to use their coffee and tea cups as well as their tajine for decoration purposes. I really need to try a tajine recipe before I leave. They are so fancy, I feel like I need one.

You can also put em in a jar to give as gifts.=D


 Ain't it pretty?

Wasalam.

Till then, Love,
Sofhan Hasni.

Monday, March 24, 2014

Salted Caramel Buttercream

Assalamualaikum

After the last post, I think I should share the recipe for the Salted Caramel Buttercream. One thing for sure, this buttercream is SUPER SWEET.I mean…it is caramel… Combining it with cakes that are also sweet would be a disaster! So thank goodness my chocolate cake is on the less sweet side.

Salted Caramel Buttecream
1/3 cup of salted Caramel sauce (recipe here)
1 cup butter (room temperature)
1 cup shortening (room temperature)
3 cup icing sugar

  1. Using an electric mixer, beat the butter and shortening for about 2 minutes or until the mixture is fluffy.
  2. Mix in the salted caramel sauce until well combined
  3. Add the icing sugar ½ cup at a time. Taste the buttercream as you go. Mix well. 

Because we use less sugar than usual, it may be less stiff than usual.  Although the consistency is still perfect for piping, you can see how the buttercream is shinier and may be more sensitive to heat.
I decided to go for a simple swirl design for this cake. Decorating a cake in Malaysia can be pretty daunting. The heat melts everything! On the other hand, my salted caramel sauce stiffens reallllllly quickly here. Haih..what to do..Either I have to start piping my buttercream in the fridge when I’m in Malaysia, or pipe my salted caramel on the heater when I’m in Montreal…You do what you gotta do....


Here are some pictures of my first ever dessert table...


Thanks Farhana for the pictures! I feel so happy today...for unknown reasons..Alhamdulillah for everything. For the today's sunshine, today's meals, family's love,opportunities and everything else. Have you thanked our Lord today?:)

Take care, Wasalam.

Love,
Sofhan Hasni

Monday, March 10, 2014

Salted Caramel Sauce

Assalamualaikum!

Today was a beautiful day. I got to wear my skirt out! Yeay! I love wearing skirts. It’s all girly and feminine. I don’t know where I’m going with this…

A couple of weeks back; I was given the honor to decorate a dessert table. I was ecstatic! Too excited for my own good. =D I know I wanted to make a big cake because I wouldn't bake big cakes unless I have an occasion to serve them. Of course this is the perfect opportunity to try new recipes. What goes with chocolate? I know. Salted Caramel; it’s so delicious and requires only a couple of ingredients, can be eaten on buttered toast in the morning, can be drizzled on ice creams or brownies, or be turned into a scrumptious buttercream. So here is the recipe for a basic salted caramel sauce…
Original recipe: here

Salted Caramel
1 cup of granulated sugar
1/3 cup of (salted/non-salted/semi salted) butter, cut into small cubes
½ cup of heavy cream/whipping cream
1 teaspoon of salt

  1. Put the sugar in a saucepan over a medium heat. Stir using a wooden spoon.
  2. Melt the sugar until it is golden brown.
  3. Stir in the cubed butter until it melts.
  4. Then, add the cream into the sauce pan and mix well. Let it boil for about 1 minute.
  5. Turn off the heat and mix in the salt.
The sauce may bubble throughout, so be careful! I don’t think it matters what kind of butter you use. If you use salted butter, and you don’t like extreme saltiness, reduce the amount of salt.or add more if you think it is not enough,it's your call. Let it cool a bit and be careful when you try your sauce. The smarty-pants me burned my tongue. Also, although the original recipe uses spatula, make sure yours can actually handle the heat!Mine melted!SO I had to re-do the recipe. Hah!=p


Here I made cake balls or I like to call them cake truffles using my salted caramel buttercream (recipe here) and drizzle the salted caramel sauce on top. YUM! Perfect as gifts or bite size dessert!


Its sunny out, go and take in all the sun!=D

Wasalam,
Till then.

Love,
Sofhan Hasni

Monday, January 27, 2014

Marble Chocolate Torte

Assalamualaikum!

Hello people. It had been a crazy freezing week. Your nose dropping freezes on your face, the need to thaw your fingers when you are outside for a bit too long, your face freezes etc. This Malaysian tropical baby, do not like extreme chilliness.No. For some reason my balcony door is not as well insulated as it was before making my apartment a frozen kingdom. Gah! The beauty of winter in Montréal =P

Anyways, I have seen people posting pictures of tortes right, left and centre! What exactly is torte you may ask? I, to be honest, think that it is somewhat a firm ganache with a crust! So I finally made tried making this bad boy! Woot-woot. It wasn’t hard to make at all! And of course, like cheesecakes, you can be extremely creative with the recipe. You can add shredded ginger in the crust, use different kind of flavoured chocolates, put some biscuit/cookie/brownie chunks...ahh the list is endless!  I was thinking of making a white chocolate torte but I was afraid that it may be too creamy so I decided to make a marble chocolate torte instead. I wasn’t too sure about using a ginger flavoured crust with milk chocolate thus I made some salty coconut topping to give it extra texture. In my book, coconut works well with EVERYTHING. So here is the super duper easy recipe. Warning: if calories scare you, this dessert may not be the best for you.

Marble Chocolate Torte

100g unsalted butter
250g digestive biscuits crumbs
500g chocolate (250g white chocolate/250g milk chocolate)
400ml double cream/whip cream

  1. Melt the butter using the microwave and add the biscuit crumbs. Mix well.
  2. Spread the butter and biscuit mixture at the bottom of a 6 inch cake pan or small moulds. Set aside.
  3. In a bowl, pour 100ml of the cream and heat it up in the microwave until it is hot (30 seconds)
  4. Stir the milk chocolates in. Set aside to cool slightly.
  5. Repeat the same process for the white chocolate.
  6. In another bowl, whip the remaining cream until soft peaks form.
  7. Divide the whipped cream into the two bowls of chocolate mixtures.
  8. Pour the batter into the moulds or cake pan. Using a skewer make a marble pattern.
  9. Refrigerate for a couple of hours or overnight


Pardon my DIY mould 


Such a simple recipe. No oven or stove needed! But I wouldn’t recommend making this often. I mean come on, you are practically eating chocolate and cream together on a bed of buttered buiscuits. That definitely screams healthy. I wish!

I made this dessert at Trisha, Abir and Jihad's new crib.LOVE THEIR APARTMENT TO BITS! Beautiful walls, fantastic kitchen and amazing location. It's a home for sure. Most importantly, their place is warm.I might as well pack my bags and move in. I wonder if I can pay rent using desserts...hurm..


Stay warm peeps.
Wasalam.
Till then,
Love,

Sofhan Hasni

Thursday, December 19, 2013

Brie Stuffed Apples En Croute

Assalamualaikum!

It definitely has been awhile! This semester was crazy as usual. Midterms, quizzes, papers, break downs, finals etc. I have been baking a lot, but for some reasons, too lazy to type the recipe up.HAH! In October I went apple picking for the first time ever! It was amazing! Endless rows of apple trees with different colors and sizes for us to pick and eat. AMAZING I tell you. Zainab and I, being girls, took the first hour just taking pictures and posing here and there like nobody’s business. Then, we had a limited time to actually pick apples and pumpkins. We ended up with about 10 kg of apples. Boy oh boy! Jakun  uolls.
The apples were crunchy and juicy! Prior to this trip, I stumbled upon this recipe: here. This was where I got my inspiration from. To be honest, I don’t really care much about pears. I mean, I’ll eat them, but they wouldn't be my first choice from a fruit bowl. Anyways, I used apples instead of pears and add the honey AFTER I baked my apples. Apple en Croute is a bit too heavy for dessert but it is fantastic for breakfast or tea. Enjoy...

Brie Stuffed Apple en Croute
5 Medium sized apples
2 sheets of Puff Pastry
125g brie
1 egg + 1 tablespoon of water
Honey 
  1. Preheat oven to 350 degree Fahrenheit
  2. Wash the apples thoroughly. Cut the top of the apple and set aside.
  3. Make a hole in the apple.
  4. Fill the apple with a dollop of brie and cover the apple with its top.
  5. Cut the puff pastry into one inch strips.
  6. Wrap the apple with strips of puff pastry. Set aside
  7. In a bowl, mix the egg and water.
  8. Brush the egg wash (egg water mixture) on the pastry.
  9. Bake apples for 15-20 minutes or until the pastry is golden brown.
  10. Drizzle with some honey


Fancy shmancy dishes are not that hard to make!:)
Stay warm Montrealers!:)

Wasalam.

Till then,Love,

Sofhan Hasni

Monday, September 2, 2013

Cream of Mussel Soup

Assalamaualaikum.

Its labour dayyy! So there is no school-yet. I shall start my final year tomorrow. Breathe..Breathe..Breathe..

It has been a week since I arrived and my sleeping patterns are still not fully adjusted. I am super sleepy in the evenings to the point of being zombified! My looong naps kept me awake at night and I barely sleep before fajr and stay awake after that. Like right now… The thing about being awake at night is that, after fajr I AM FAMISHED! Of course I always have food in the frigde.Eheh..I just finished my last bowl of Cream of Mussels and decided that I have to write my recipe down straight away before I forget! Like I usually do.

I went to PA Supermarche the other day and they were selling mussels for 4$!A complete steal I tell ya. Mussels are on of my favorite seafood. Who could resist a great mussel dish?This soup is fantastic for cold days like today!

So here is the recipe..

Original recipe here


Cream of Mussel Soup

1 ½ cup water
1 anchovy cube
1 cup of milk
½ cup of cream
1 whole onion, chopped
2 cloves of garlic, chopped
300g mussels
3 tablespoon of butter
Salt and pepper to taste
Parsley flakes (optional)
2 ½ tablespoon of flour

  1. Clean mussels thoroughly and set aside.
  2. In a pot, melt butter and sauté the garlic and onion.
  3. Once the garlic and onion soften, add the anchovy cube. Stir for about a minute.
  4. Pour in the water and let it simmer.
  5. Add in the mussels and cover the pot with its lid for 5 to 6minutes.
  6. Pour in the cream and milk.
  7. Once the soup simmers, add 1 tablespoon of flour at a time and add more depending on the consistency of the soup.
  8. Season the soup with salt, pepper and parsley flakes.
  9. Serve with some toasted garlic bread.


Phew. That was quick and easy. Let’s make some coffee shall we? Or…go back to bed? Decisions decisions.

Wasalam

Till then,
Love,

Sofhan Hasni

Monday, April 1, 2013

Fruit Tart


Assalamualaikum!

Spring is finally here Alhamdulillah! I could finally take out my dresses and skirts from storage!Woot woot. Soon would be the barbecue season!Ahhh can’t wait! I miss those days when I don’t have to worry whether my coat is thick enough to last me the whole day or having to put lotions in my bag for reapplications through out the day.Bliss!

It's funny how I’ve been meaning to blog for the past couple of weeks but I was too busy with school work. Now when I actually have time to sit down..I sat here in front of may laptop..and my mind went completely blank. Which recipe should I write first?Which photos do I have to edit first?oh wait..where are the photos?=.=’ Not cool Soffy. Not Cool...

A couple of weeks back our lovely Kak Isma wanted to learn how to make a fruit tart. It sure brought back memories!When I first came to Montreal, fruit tart was the first dessert I made. That was THREE years ago!How time flies!So here is the recipe for fruit tart to which kak Isma said.. "sedap sangat rasa nak nangis”.AWWWW!
 

Sugar Crust/Pâté Sucree
1 cup all purpose flour
1/2 teaspoon salt
1/3 cup butter(cold)
2 to 3 teaspoon cold water (or more depending on the consistency of the dough)
1 tablespoon of sugar

  1. Cut the cold butter into chunks.
  2. In a big bowl, put in the flour, sugar and chunks of cold butter.
  3. Using your fingers or fork, combine the flour,butter and sugar until crumbly
  4. Add in water little by little until the crumbs come together to form a ball of dough.
  5. Wrap the dough in a plastic wrap and leave in the fridge for 15-20 minutes
  6. Preheat the oven to 350 degree Fahrenheit in the mean time.
  7. Place the dough on a well floured surface after removing it from the fridge.
  8. Roll it out using a rolling pin or simply press them using your palms.(no one is judging!)
  9. Place the rolled dough on a 9 inch pie pan.
  10. Cut off the excess dough.
  11. Using a fork make small holes on the bottom of the pie crust
  12. Bake for about 20 minutes or until the crust is golden brown


Pastry Cream
1 1/4 cups
1 teaspoon vanilla extract
2 large eggs
1/4 cup sugar
2 tablespoons all-purpose flour
2 tablespoons cornstarch

  1. In a bowl beat the eggs with sugar until combined
  2. Sift the flour and corn starch into the mixture and continue mixing until a paste is formed. Set aside.
  3. In a saucepan, bring the milk to just boiling (foams up). Remove from heat.
  4. Add the milk to the egg sugar mixture a few tablespoons at a time to avoid the curdling of the eggs.
  5. Once the egg sugar mixture is warm enough, pour in all of the milk and mix well
  6. Put the mixture back into the saucepan on low heat and stir continuously.
  7. Once it thickness, wait for a about 2-3 minutes   and remove from heat.
  8. Stir in the vanilla


Fruit Tart
Pate Sucree/ Sugar Crust
Pastry Cream
Fruits of your choice

  1. Spread the pastry cream evenly on the crust
  2. Slice the fruits of your choice into small pieces.
  3. Arrange the fruits on the pastry cream to your liking.
  4. Chill the fruit tart for at least half an hour in the fridge before serving


Give it a try!=D
Sorry for the bad pictures.It was dark and we were...well...impatient?=p

Original pastry cream recipe from: here
Take care!Wasalam


Till then, Love,
Sofhan Hasni 

Tuesday, March 12, 2013

Black Diamond


Assalamualaikum

The break is over! NOOO! Back to reality baby! No more waking up late. No more brunches and dinners and gossips. Oh no!

One of the highlights of my break..or wait..one of the highlights of 2013 is…. I did it! I told you I’m going to challenge myself to ski down the Black Diamond slope..and that’s what I did! Alhamdulillah. It was crazy! Surprisingly it wasn’t as hard as I thought it would be. My nerves got to me the first time around as I somersaulted, slided, rolled in different ways down. The second time however, it was better! Last year I was scared of the height and speed. 

Alhamdulillah, I overcame those fears and REALLY REALLY enjoyed skiing. I was thinking of joining another trip to the slopes to which my mum was like..”op..op..dah dah la tu”. My mum was just worried. The day after the trip every inch of my body hurts. The next day I got myself a massage and yeap..my back was bruised. It was crazy and is much fun. 


So.. Bungee Jumping next? We’ll see…

Take care and stay safe!

Wasalam.

Till then, Love.Sofhan Hasni

Sunday, March 10, 2013

Tiramisu Charlotte Cake


Assalamualaikum.

The girls and I decided to have an all girls lunch/dinner/gossip/bonding session last Wednesday. We feasted on Nasi Lemak, Rendang, Fruit Tart , Chocolate Cake, Tiramisu and bottles and bottles of Barbicans. It was a fun day to let loose. Sit around and just chat like nobody’s business.

I wanted to make Tiramisu for awhile now. The last time I made it was a year ago. That time I made a Tiramisu trifle so this time I decided to my hands on a Tiramisu cake. It wasn't a complete success but wasn't a complete disaster either. My friends liked it. But it wasn't as coffee-ish as I would like it to be. But then again, they are not coffee crazy like I am. If it is a coffee flavored cake…it BETTER taste like coffee. So next time, I’ll be sure to drench my vanilla sponge cakes in coffee. DRENCH DRIPPING COFFEE GOODNESS NEXT TIME!

Making Tiramisu is not hard AT ALL. You could simply make an easier version buy substituting the vanilla sponge cakes to ladyfingers or savoiardi which is not even expensive. Mine was a  dollar for a humongous packet of cookies. Also, Mascarpone can be quite pricey especially in Malaysia. So for this recipe, I usually use cream cheese. It’s cheaper and STILL delicious. It’s easy, its delicious and its pretty. What could go wrong?

original recipe from: here

Vanilla Sponge Cake
2 cups cake flour
2 teaspoons baking powder
1/8 teaspoon baking soda
1/4 teaspoon salt
2/3 cup butter at room temperature
1 cup sugar
3 eggs
1 egg yolk
1 1/2 teaspoons vanilla
3/4 cup buttermilk

  1. Preheat oven to 350 degree F
  2. Sift the dry ingredient i.e. cake flour, baking powder, baking soda and salt. Set aside
  3. In a big bowl, beat the butter and sugar until light and well combined.
  4. Beat in the egg yolk, eggs and vanilla into the butter mixture, one at a time.
  5. Add the dry ingredients and buttermilk into the butter mixture alternately. Starting and ending with the dry ingredients.
  6. Divide cake batter in two 9-inch lined and oiled springforms.
  7. Bake for 20-25 minutes or until toothpick comes out clean after being inserted in the middle of the cake.


Coffee mixture
1 cup of hot water
1 teaspoon of instant coffee powder
2 tablespoon of sugar

  1. Mix everything together and set aside


Filling and frosting
1 cup of cream cheese
2 cups of heavy cream
¾ cup of icing sugar

  1. In a bowl, beat the cream cheese and sugar together until light and well mixed. Set aside
  2. In another bowl, whip the heavy cream until stiff peaks form.
  3. Using a spatula slowly fold in the whipped cream into the cream cheese mixture.


Tiramisu Charlotte Cake
2 Vanilla cakes
Filling and frosting
Coffee mixture
Ladyfingers or savoiardi

  1. Place one of the vanilla sponge cakes on a serving plate.
  2. Using a knife, stab and make holes in the cake.
  3. Using a spoon, slowly pour coffee on the top of the cake. Use as much as you need.
  4. Cover the top of the cake with half of the filling and frosting mixture.
  5. Repeat the same steps with the other cake layer. However, save some of the filling and frosting mixture to cover the sides of the cake.
  6. Once the sides of the cake is iced, cut (if needed) about 1 cm-2 cm of the ladyfingers and arrange them on the side of the cake.
  7. Refrigerate overnight to let the cakes and ladyfingers to soak in the flavors.
  8. Cover the top of the Tiramisu cake with chocolate powder or shaved chocolate.


 tie a ribbon around it and sprinkle some chocolate powder :)


The ladyfingers-around-the-cake makes this Tiramisu cake a Charlotte cake. It’s a “decorating” technique where cakes/pudding/tarts are surrounded with a wall of ladyfingers or breads. It’s easy to do and works perfectly as a gift. Just tie a ribbon around it! No hassle and PUFF, a sophisticated and decent looking cake is created.

There are a few changes that I would make next time.
First, THE COFFEE FLAVOR  I need more of it! I’ll definitely take my time to make sure every inch of my cakes is filled with coffee. Also, I’d add some coffee mixture on the filling and frosting mixture as well. Oh wait..maybe I could put some coffee powder in my cake too? Ehehehe.
Second thing is, I need a better ribbon and learn a better way to tie a proper ribbon.
Third thing that I may or perhaps YOU may want to change is the ratio of the cream cheese and heavy cream.  I used more cream in this recipe, it is a lot lighter and less cream cheese concentrated. If you want a heavier and cheesier taste, feel free to switch the ratios of the two.

Since kak Isma’s birthday is next week , we decided to use this cake as her birthday cake. Yeay!
Thank you for being a great kakak to all of us here! HUGS!


Okay I need to make dinner and continue studying. Meehun Sup for dinner. Yeay! 

Take care! Wasalam.

Till then, 

Love,
Sofhan Hasni


Sunday, February 24, 2013

Classic New York Cheesecake with Mixed Berry Topping/ Marble Chocolate Cheesecake


Assalamualaikum!

I remembered the first time I made cheesecake. It was for Eid when I first got here. When I first got here I didn't really know how to cook. I would go on Google and search for recipes (still do) and go to Loblaws after school and try make a decent meal out whatever I bought. We were ambitious. I was at least. Kuew Teaw (I still don’t know how to spell it) Hong Kong la, Tomyam from scratch la, apple strudles  la..and of course..cheesecake. I finally tried making a cheesecake again about a month ago and made another two on Thursday and Friday. Again, these cakes are made for a birthday. A special someone who is devoting her life for charity work. She is none other than our bonda in Montreal, Auntie Sabria. Illya and I stayed at her place when we first got here. She is always on her feet cooking for shelters, homeless people, weddings, iftars, Islamic gatherings and the list goes on. She is well known in Montreal for her contribution and of course, her big heart!

Auntie Sabria loves cheesecake, so for her birthday celebration with MSA McGill, I decided to make her a cheesecake. Since a lot of people were coming, I was told to make two cakes. Mind you, I have NOT mastered the art of making a crack-less cheesecake. My springform pan is too big for my roasting dish thus I can’t use the water bath system. Oh well.. I’m not sure if that would stop these cheesecakes from cracking. It’s really puzzling when a website tells you NOT to open the oven door as the cold air would somehow make the cake crack while other sites tells you that you should take it out immediately or some would say use water bath, some say you don't, some say check your oven….Whaaa? I really think we should have a Global Cheesecake Conference to actually come to an agreement and stop confusing clueless newbie baker like I am. Oh stahp!

I made a classic new York cheesecake with two different variations! Yeay!
Original recipe here
Classic New York Cheesecake

1 ¼ cup of finely crushed graham crackers
¼ cup of melted butter
¾ cup sugar
1 kg of creamcheese (4 packages)
1 cup sour cream
1 tablespoon vanilla
4 eggs

  1. Preheat oven to 325 degree Fahrenheit (300 degrees if using a dark nonstick springform)
  2. Spray the insides of a 9-inch springform. Set aside
  3.  In a bowl, mix the crushed graham crackers and melted butter together. Press firmly on the bottom of spring form.
  4. Bake for 10 minutes and set aside.
  5. Using an electric mixer, beat the cream cheese and sugar together until well combined.
  6. Add in the sour cream and vanilla and continue mixing.
  7. Add in the eggs into the mixture. One at a time.
  8. Pour the mixture on to the baked crust and bake for 55 minutes to 1 hour.
  9. Turn off the oven and let the cheesecake rest in the oven for another hour with the oven door slightly ajar.
  10. Refrigerate for a couple of hours.

 You’ll see that by this time, the middle part of the cheesecake would still be jiggly. But really, it’s done. It’ll firm up once it cools. And yes. I kid you. You are DEFINETLY welcomed to dig right innnn!Do it..I won't judge..


Mixed Berry Topping

¼ cup of strawberry jam (or any berries)
1 tablespoon of water
Strawberries and blueberries (Or any of your choice)

  1. Mix the jam with water and heat it in the microwave for about 30 seconds.
  2. Spread the jam over the top of the cheesecake.
  3. Arrange the berries on the jam.


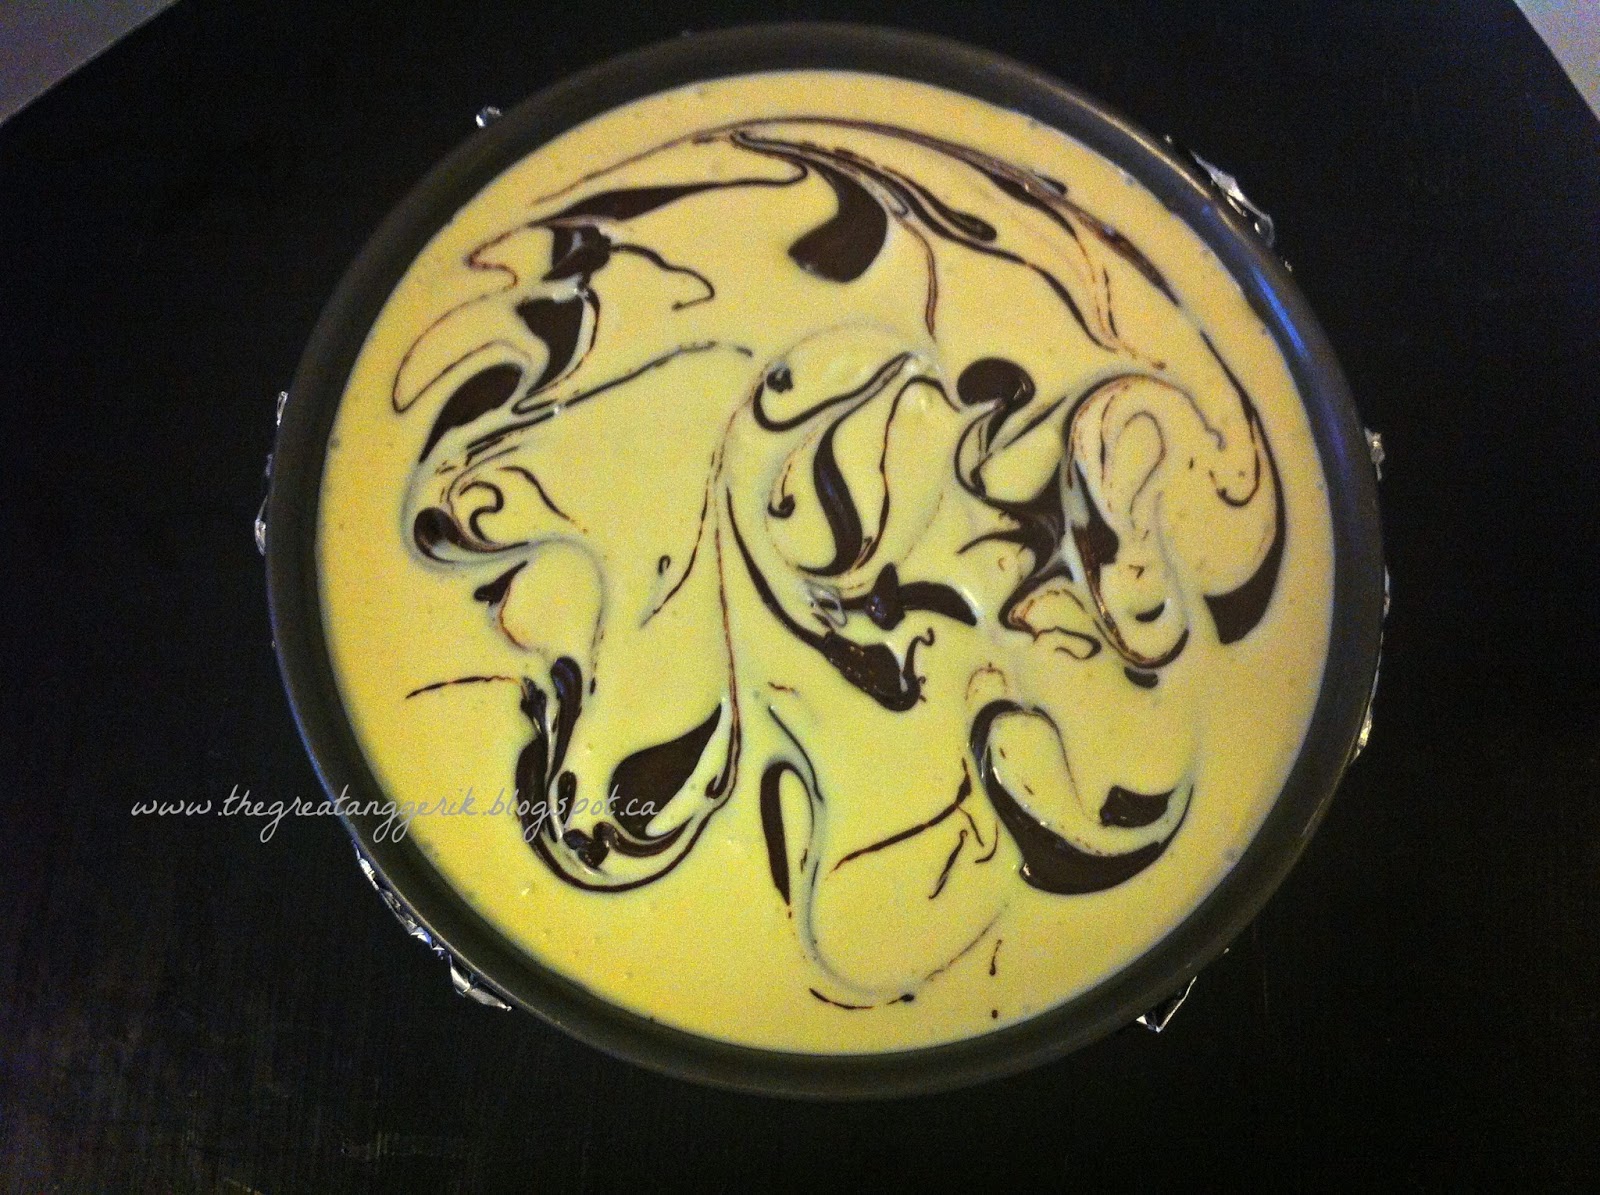
 Chocolate Marble Cheesecake

½ cup of melted chocolate

  1. At step 8 (refer to NY cheesecake above), add dollops of melted chocolate in the cheesecake batter.
  2. Using a knife or bamboo skewer, swirl the melted chocolate around the batter to create a marble effect.
  3. Put in oven as stated in previous recipe.


Oh hello Grand Canyon!

Err.could this pass as art?=P

Sorry this photo is extra bad. had to rush to deliver these babies!
 
Since the marble cheesecake cracked, I melted some more chocolate and filled in the cracks. I then refrigerate it for about an hour to let the chocolate set. Teehee.

The cheesecakes were absolutely delicious! Oh wait! I didn't try the marble chocolate one. Oh well, I hope it tested great too. Hihi. Making cheesecake are definitely easy BUT, tedious if you want to make it EXACTLY perfect! If I’m eating on my own, I wouldn't mind if there’s a Grand Canyon in the middle of my cheesecake. HECK! It’s cheesecake for God sake!


Okay. Now I’m hungry..=.=’

Goodnight Lovelies!

Wasalam.

Till then,
Love,
Sofhan Hasni